Help Panel with IFS.ai Copilot
Help Panel With IFS.ai Copilot is an AI-powered interactive assistant designed to provide guidance if you are not familiar with how to perform certain actions within the IFS Cloud platform.
Please Note: For the 24R1 and 24R2 releases, IFS.ai Copilot is available exclusively in English.
IFS.ai Copilot Tab
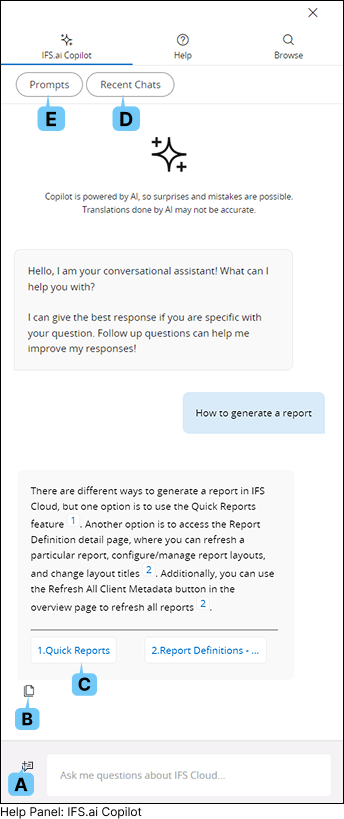
IFS.ai Copilot tab features a conversation interface powered by artificial intelligence (AI) to engage with users in a human-like manner. This AI chat system is engineered to comprehend natural language input, analyze information, and generate summarized responses compiled from the IFS documentation. Users can ask follow-up questions to refine responses. The system includes source references as clickable links, enabling
you to navigate to the cited articles for further information.
The IFS.ai Copilot interface will keep the context of the conversation to a certain degree.
 |
|
 |
|
A : New Chat |
|
You can switch topics and initiate a new conversation with the
IFS.ai Copilot interface by clicking the New Chat button(A). |
 |
|
B : Copy |
You can copy your chat query or response using the Copy(B) option, which becomes available when you hover your mouse cursor over a chat balloon. |
| C : Hyper Link |
|
You can access any hyperlink referencing IFS Cloud documentation by clicking the links provided in the chat response. Each link will be numbered according to its order in the chat response. Once you hover over a hyper link Copy(B) button will be available for you to copy the hyperlink if necessary |
 |
|
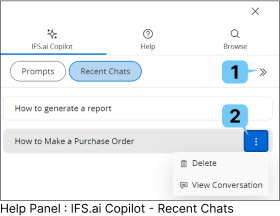
D : Recent Chat |
You can access previous conversations with the chat interface during your current IFS Cloud Web session by clicking the Recent Chats(D) button. This will open up a recent chat window containing all your previous chats.
Please Note: The IFS.ai Copilot interface retains chat records only for the duration of your current IFS Cloud session. Once you log out of the application, all saved conversations will be erased. |
 |
|
 |
|
1 : Hide Recent Chat |
|
Click this button to hide the Recent Chat section and go back to the main chat interface |
|
|
| E : Prompts |
|
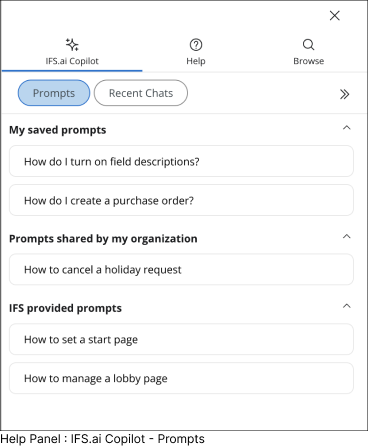
A Prompt is the question or instruction given to IFS.ai Copilot. The quality and accuracy of the responses generated by IFS.ai Copilot are directly influenced by the clarity and precision of the prompt. Well-crafted prompts lead to more accurate and high-quality outputs.
 |
|
To access the prompts, click the Prompts (E) button at the top bar of IFS.ai Copilot tab |
|
| How to Use a Prompt |
 |
|
IFS.ai Copilot allows you to use prompts in a contextual manner. This means that different IFS Cloud pages will offer different sets of prompts relevant to the specific page you are on.
The available list of prompts within the IFS.ai Copilot will automatically adjust based on the page, providing you with tailored options.
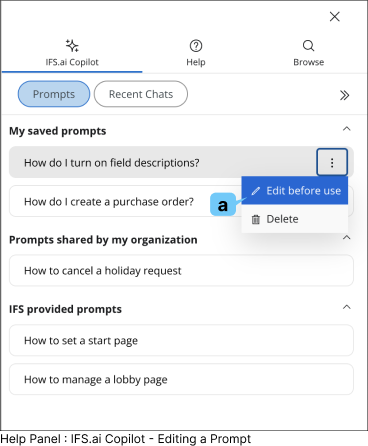
There are four prompt types, those are :
- My Saved Prompts : Prompt saved by you for future use
- Prompts Shared by My Organization : Prompt saved by your organization for you to use
- IFS Provided Prompts : Prompts provided by default from IFS
|
 |
|
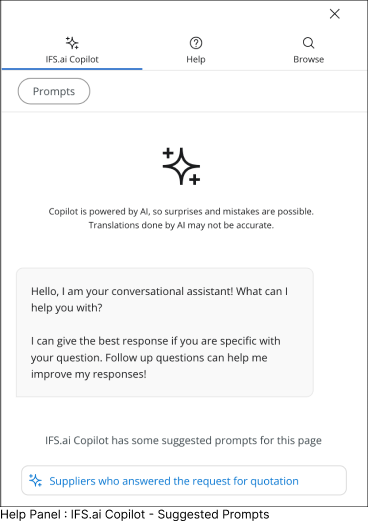
- Suggested Prompts : When navigating to pages linked to saved prompts, suggested prompts will automatically appear in the chat view.
To use them, simply click on a prompt, and it will be inserted into the chat, where IFS.ai Copilot will generate a response.
|
|
To use any of these prompts, simply click on a prompt, and it will be inserted into the chat, where IFS.ai Copilot will generate a response.
|
 |
|
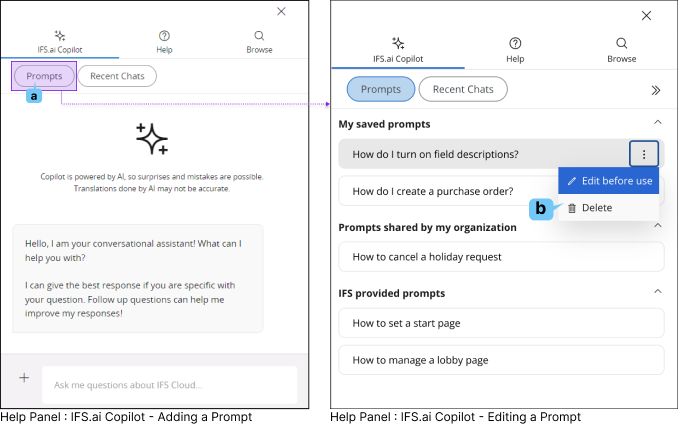
You can easily edit a prompt before using it:
- Hover your mouse over the desired prompt to reveal the three-dot menu, which will offer additional options.
 |
|
- Click the Edit before use(a) button.
|
- The prompt will then appear in the chat input section in an editable mode.
- Make any necessary changes directly in the chat input before submitting the prompt.

|
|
| How to Save a Prompt |
 |
|
There are several methods you could use to add a prompt in IFS Cloud:
-
Using IFS.ai Copilot
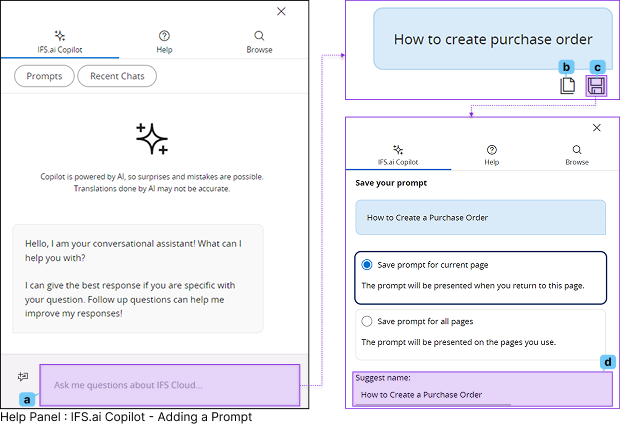
You can enter your prompt in the
Chat Input Section(a) of IFS.ai Copilot, and it will generate a response based on your input. Once your prompt is added, you can perform the following actions by hovering your mouse over the prompt in the chat window:
 |
|
Copy(b) your Prompt by clicking the copy button. |
 |
|
Save(c) your Prompt by clicking the save button. |
Clicking the save button will open a simple interface where you can choose to save the prompt either for the current page or as a universal prompt.
You can also add a description—a shorter or simpler version of the prompt—in the Suggest Name(d) field to make it easier to identify later.
Please Note: The prompt you created will display this description on the prompt tile which would allow you to easily identify the appropriate prompt
Once you've finalized your choices, click the Save button to confirm. A notification will appear, confirming that the prompt has been saved, and you will be returned to the main Copilot view.
|
|
 |
|
- Using My Copilots Prompts pages
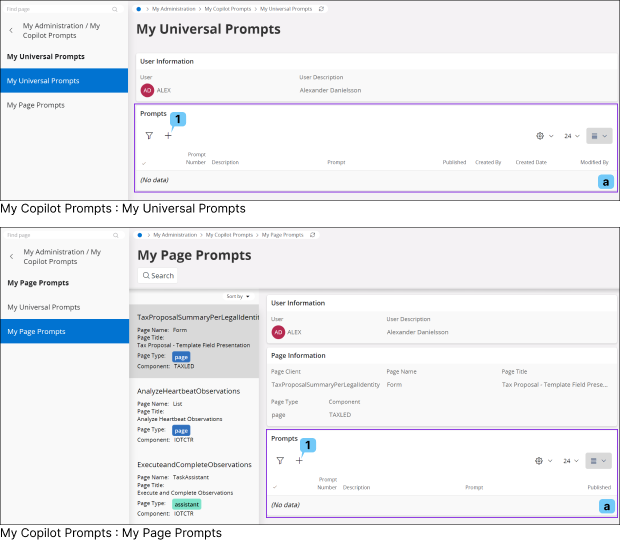
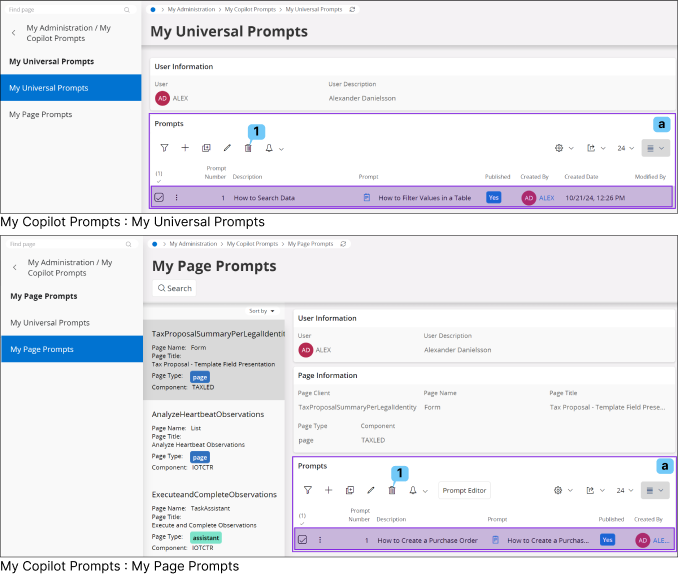
To save and manage your custom prompts, navigate to My Administration > My Copilot Prompts.
- To make your prompts available across all IFS Cloud pages when using IFS.ai Copilot, add them to the My Universal Prompts page.
- To limit a prompt to a specific page, add it to the appropriate section under My Page Prompts.
Please note that the process for adding prompts to either of these pages is the same.
- Go to the Prompts(a) section of My Universal Prompts page or
- Select a page tile from the Record Selector in My Page Prompts page and go to the Prompts(a) section.
 |
|
Click the Add (1) icon to add a new prompt, this will open up a new row for you to add a
universal prompt or a page prompt in the Prompts (a) section |
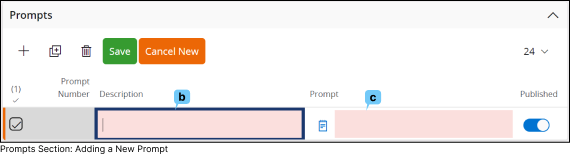 |
- Enter a description in the Description (b) field.
- Input the prompt content in the Prompt (c) field.
- Use the Published (d) toggle to select whether to publish or un-publish the prompt.
- Click Save to save your prompt, or click Cancel New to discard your entry.
|
|
| How to Delete a Prompt |
 |
|
Use any one of the following methods to remove prompts you have created in IFS Cloud:
-
Using IFS.ai Copilot
- Access prompts section by clicking the Prompts(a) Icon in IFS.ai Copilot tab
- Hover your mouse cursor over the desired prompt you wish to manage
- 3-dot menu will appear with additional options which would allow you to edit or delete the prompt
(Please refer How to Use Prompt section to learn more about Edit before use option)
 |
|
Click on Delete(b) button to remove the prompt from the list |
|
|
 |
|
- Using My Copilots Prompts pages
Navigate to My Administration
> My Copilot Prompts.
- Go to the Prompts(a) section of My Universal Prompts page or
- Select a page tile from the Record Selector in My Page Prompts page and go to the Prompts(a) section.
 |
|
Select a prompt from the list and click the Delete(1) button to remove the prompt |
|
|
Help Tab
The Help tab offers a comprehensive overview of all available support features within IFS Cloud, comprising three main sections.
 |
|
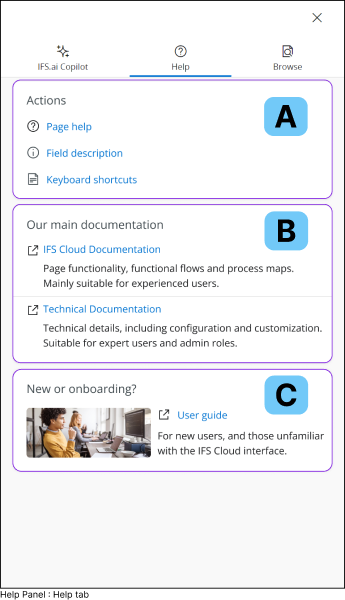
A : Actions
Consists documentation on all the actions you can execute within the
IFS Cloud pages, such as
Note: Field Descriptions and
Page Help are linked with IFS Cloud Web pages, therefor these selections will not appear when you open IFS.ai Copilot on
Home.
B : Our main Documentation
Comprises detailed documentation on IFS Cloud and an administrative guide on configuring the application.
- IFS Cloud Documentation
- Technical Documentation : Comprehensive guide for application developers on configuring the IFS Cloud application to meet client requirements.
C : New or onboarding
New users of IFS Cloud can utilize the content within this section to expedite their onboarding process.
|
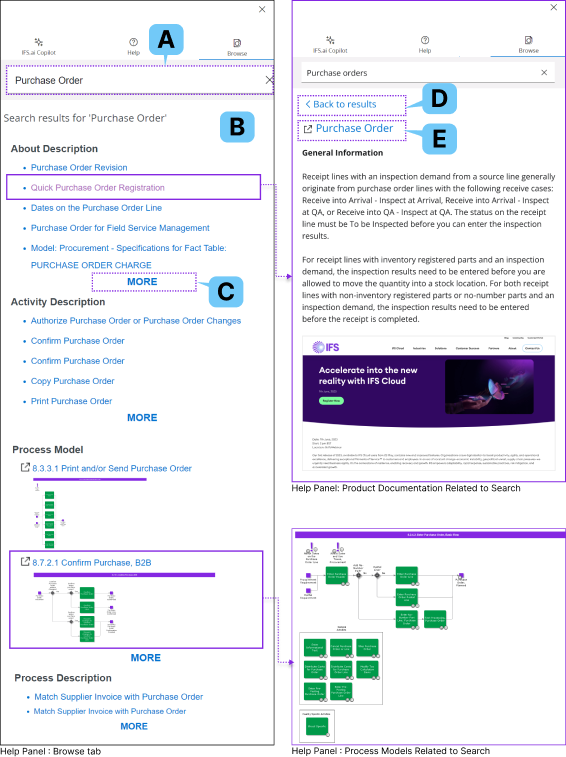
Browse Tab
The Browse tab allows you to search information within IFS Cloud, enabling you to quickly locate product documentation from the documentation repository. This facilitates rapid access to the information you need.
In order to access the information , click on any link shown in the Search results section.
 |
|
 |
|
A: Search Bar |
|
Enter your search keywords into the Search Bar(A) and press the Enter key to initiate the search.
Upon initiating a search, the system categorizes the information according to predefined product documentation categories, streamlining your search process. |
| B: Search results |
|
Upon initiating a search, the system categorizes the information according to predefined product documentation categories, streamlining your search process. All search results related to your query will be listed in the Search Results section. |
 |
|
C : More |
|
Click on the MORE(C) button to reveal additional results organized into main sections within the Search results(B) section. |
 |
|
D : Back to results |
|
After accessing a link within the Search Results (B) section, simply click on the Back to results (C) button to return to the search results section. |
 |
|
E : Navigation Link |
|
If you wish to navigate to the page where the search results originated from, an icon will be displayed next to any title linked to IFS Cloud support documentation. Simply click on the title next to the icon to navigate to the page.
Note: Process models are always accompanied by a navigation link. When you click on the link, it will open up in a new browser tab, allowing you to explore the process model more thoroughly. |
|
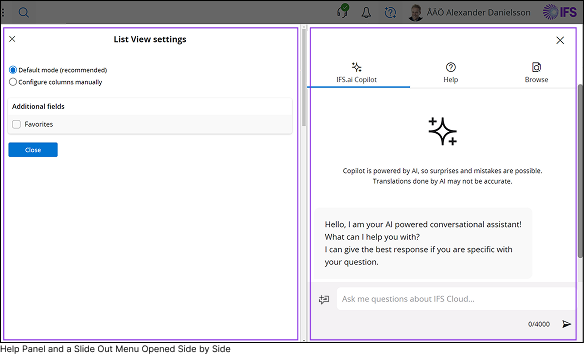
Note: If you have any slide-out menus open, you won't be able to access Help Tab. However, if you already have Help Tab open within your IFS Cloud application, when you access a slide-out menu, both Help Panel and the slide-out menu will be displayed side by side for your convenience.