Schedule a Report

Introduction

Order Report Page  

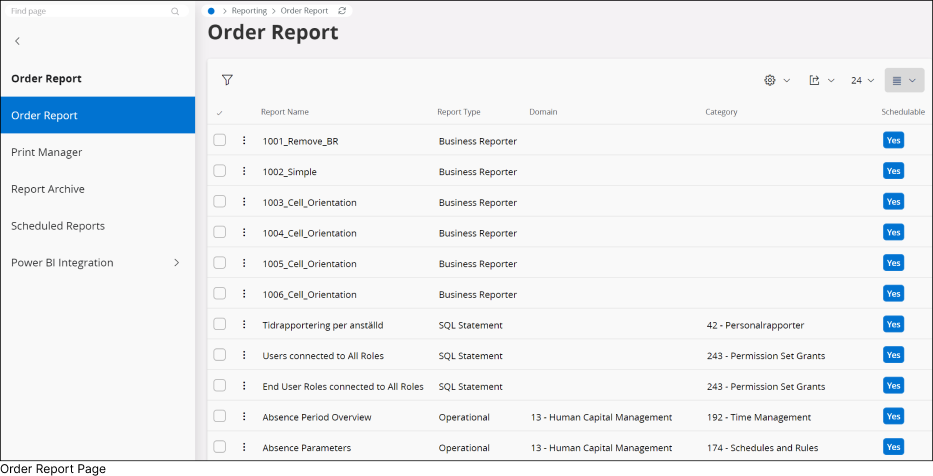
The Order Report provides you the option to generate schedule reports for Operational Reports and IFS Business Reports based on available report templates.

Depending on your privileges within the system, you can either create a report template yourself or have someone with the appropriate access privilege create it for you.

Once created, the template can be published in IFS Cloud, allowing you to generate a scheduled report according to the created template.

To schedule a report go to Reporting > Order Report Page in IFS Cloud Web using Navigator Menu.

Scheduling a Report

Scheduling a Report

Once you are in the Order Report page:

  • Select the desired report template from the list (1)

or

  • Utilize the filter option to refine your search for the desired report (2), and then select the desired report template from the list (1).

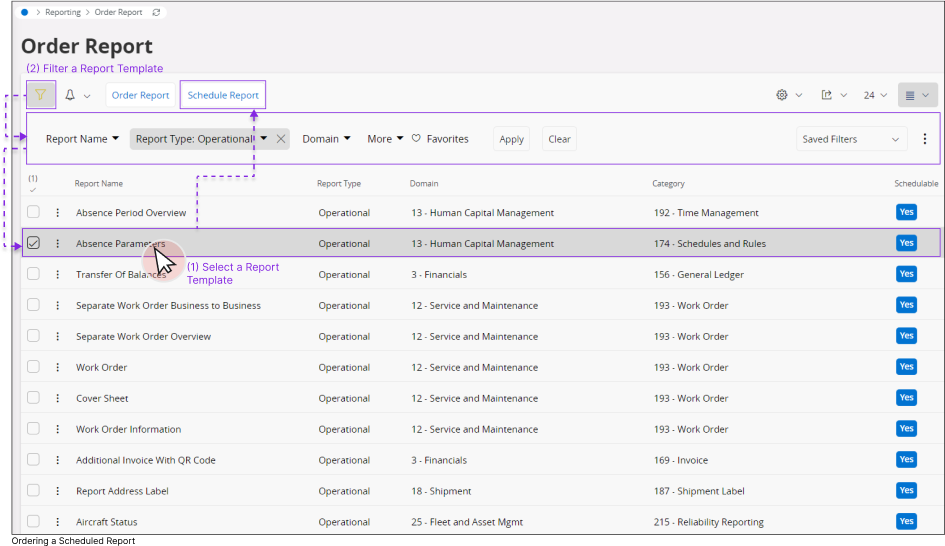
After selecting a desired report template, you'll have access to the Schedule Report functionality, enabling you to generate a scheduled report.

Schedule Report : Scheduling Assistance Page

Scheduling Assistance Page  

Once you select a desired report template from the list:

  • Click the Schedule Report button to access the Schedule Report Assistance page and initiate the report scheduling process.

The Schedule Report Assistance page offers step-by-step guidance to schedule a report.

Review each section below to learn how to complete the information for the Schedule Report Assistant.

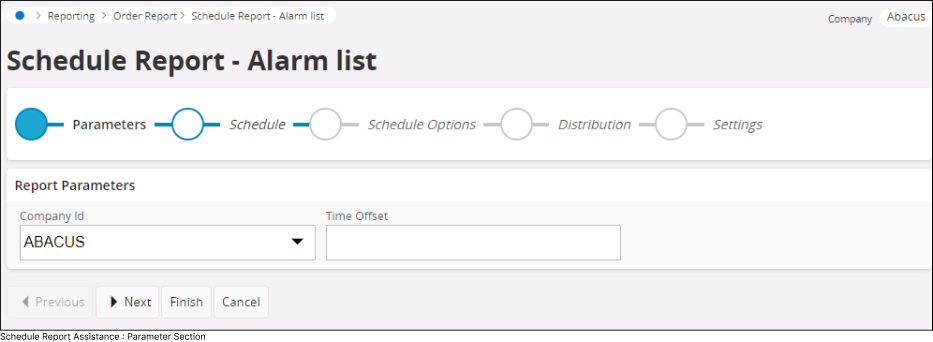
Scheduling Assistance Section 1: Parameters

1.

Scheduling Assistance Parameter Section

The Parameters section enables you to define all the parameters you wish to have before generating the scheduled report. This ensures that the report includes only the data within the defined parameters.

  • Report Parameters: Report parameters vary depending on the report type and underlying configuration. Some reports do not require any parameters to generate the report. Fill out the report parameter section with the desired parameter values and proceed to the next section.

Once you complete defining all the Report Parameters click the Next button to move to the next section.

Scheduling Assistance Section 2: Schedule

2.

Scheduling Assistance - Schedule Section

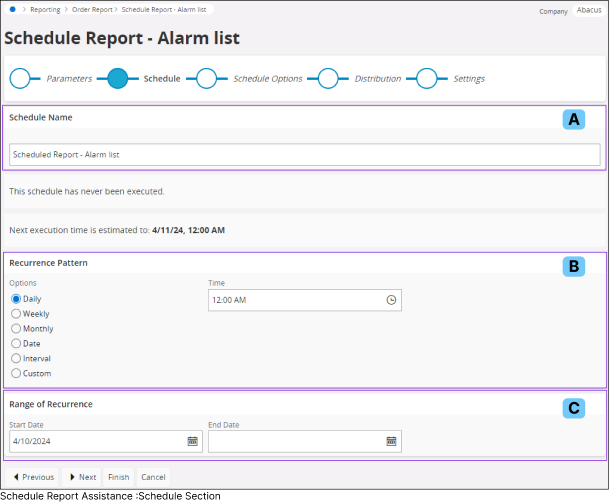
The Schedule section allows you to define a schedule for the report

  • A: Schedule Name
    Utilize this section to establish a personalized name for the schedule you are generating.
  • B: Recurrence Pattern
    Specify the frequency at which you wish to run the report. Choose a frequency from the available options in the Options section and designate a schedule time for the report to execute in the Time section.
  • C: Range of Recurrence
    Specify the duration for running the report at the defined frequencies in Section B. Choose a starting date for the schedule using the Start Date picker, and select an end date to conclude the scheduled report using the End Date picker.

Once you complete defining all the Scheduling Parameters click the Next button to move to the next section

Scheduling Assistance Section 3: Schedule Options

3.

Schedule Options

The Schedule Options section allows you to enable/disable some of the schedule features

  • A: Options
    In the Options section, you have the ability to activate/deactivate the schedule using the Set as Active toggle. Additionally, you can select the desired language for the report from the Language Code drop down menu.
  • B: Streams
    The Streams section enables you to adjust notification settings. Utilize the Send Stream Notification toggle to activate or deactivate notifications associated with scheduled reporting.

Once you finish the selection of all the Schedule Options, click the Next button to move to the next section

Scheduling Assistance Section 4: Distribution

4.

    Scheduling Assistance: Distribution Section
  • A : Distribution Users
    Select all users from the left column and transfer their names to the right column to distribute the report to each individual user.
  • B : Distribution Groups
    Choose all user groups from the left column and shift the group names to the right column to distribute the report to each user group.

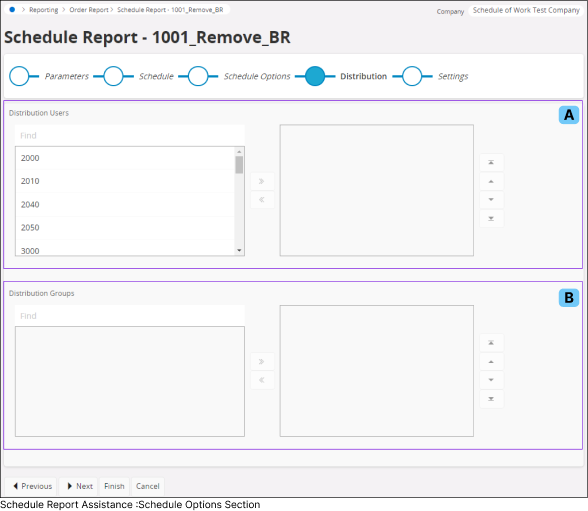
Once you finish selecting all the users and user groups, click the Next button to move to next section.

Scheduling Assistance Section 5: Settings

5.

    Scheduling Assistance: Settings Section

The Settings section enables you to define additional settings on the scheduled report such as report layout, reporting printing and archiving options

  • A : Report
    In this section, choose a layout and language for the report distribution. Utilize the Layout drop down menu to select a predefined layout, and select the desired language from the Language drop down menu for distributing the report in the selected language.
  • B : When scheduled report is finished
    Use this section to perform the following actions, once the system finish generating the report.
  • Do Nothing : System will not perform any further actions after generating the report
  • Print using: Once you select this option, a new drop down menu will be available for you to select the printer type. Select any printer type from the drop down to print the report.
    Print : Drop down Menu
  • E-mail to : Once you select this option, a new input field will be available for you to add an email address to email the report as soon as its generated.

    E-mail to: Field

  • C : Report Archive
    You can use this section to define scheduled report archiving options.
  • You can enable the E-mail to option to email the archived report to a user, once enabled a new input field will be available for you to add an email address to email the report as soon as its archived.
    E-mail to: Field
  • If you wish to access the report later in the report archive table, you can select the Archive the report as a document option. Once activated, a new input field will appear, allowing you to add a Document Number, which will be utilized during the archiving process.
    Document No. Input Field
    Once you finish adjusting all the scheduled report settings, click the Finish button to finish the scheduling process.

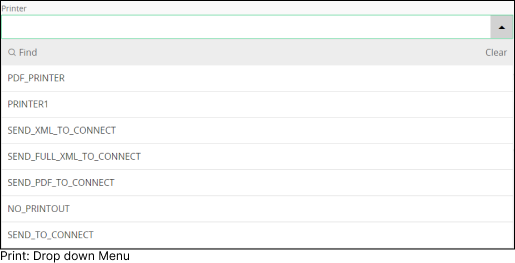
Access Scheduled Reports

Scheduled Reports Page  

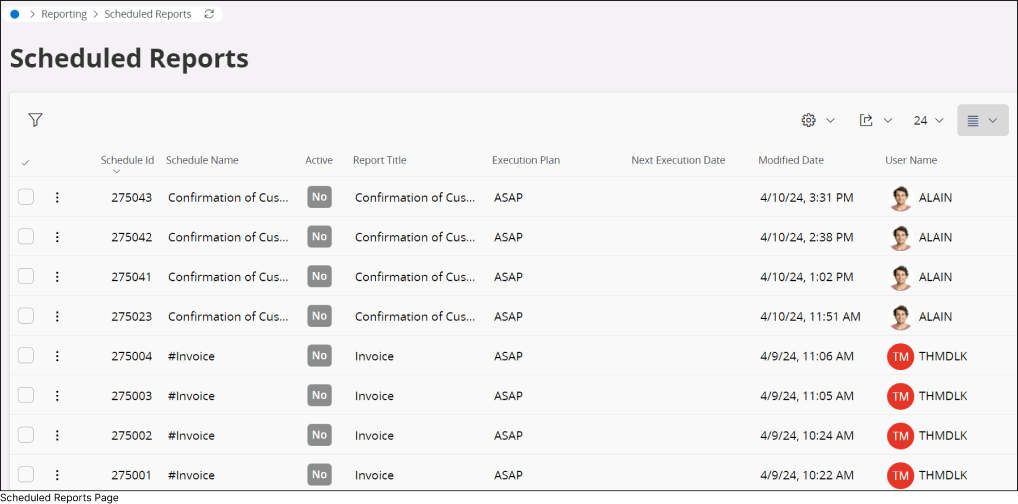
You can view all the scheduled reports by accessing the Scheduled Reports page.

To access scheduled reports page go to Reporting > Scheduled Reports Page in IFS Cloud Web using Navigator Menu.