Attachments
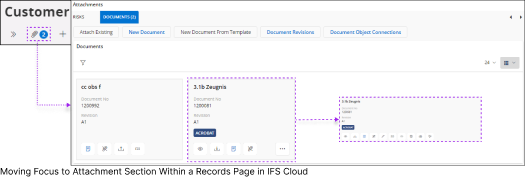
IFS Cloud allows you to add attachments to records and provides various options to manage those attachments within the application. Locate the attachment button on the command bar of a record's page. Upon clicking this button, application will seamlessly shift focus to the attachments section.
 |
|||||||||||||||||||||||||
You can handle all the attachments associated with a record by using this option. Clicking the attachment button will take you to the attachments section at the bottom of the records page. This is where you can conveniently manage and access all files linked to the specific record. |
|||||||||||||||||||||||||
|
When you attach a file to the record, a number will appear next to the attach button. This number signifies the count of files that are attached to the record.
|
|||||||||||||||||||||||||
|
|||||||||||||||||||||||||
Components of an Attachment Tile
Attachment tiles consists of following features:
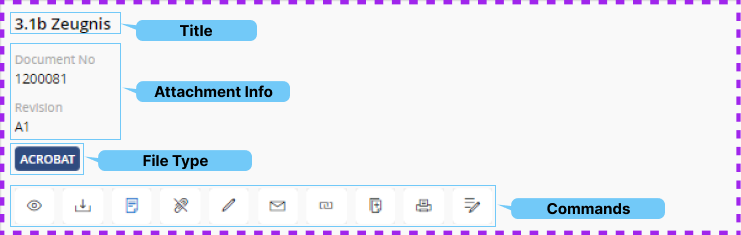
You can use the following commands in an attachment tile to perform following actions:
| Icon | Command Name | Description |
 |
Preview the Attachment |
Use this option to get a preview of the attachment you have added to the record. |
 |
Download the Attachment |
Use this option to download the file within the attachment slot. |
 |
Upload a File to the Attachment Slot |
After creating a placeholder in the attachments, utilize this option to upload a file to that specific placeholder. It must also be noted that only one file can be uploaded for each placeholder. |
 |
Add Notes to the Attachment |
Use this option to add a custom note to the attachment. |
 |
Remove the Attachment |
Use this option to remove your attachment along with the placeholder. |
 |
Edit the Attachment |
Use this option to modify your attachment within the place holder. |
 |
E-mail the Attachment |
Use this option to send the attachment via an e-mail. |
 |
Copy the Link to Attachment |
Use this option to copy the link of the attachment. |
 |
Copy the Attachment to a File |
|
 |
Print the Attachment |
Use this option to print the attachment via a configured device. |
 |
Send to E-signature |
Use this option to send the attachment to get an e-signature. |